On the coldest days this winter I didn't go to the hangar because with limited heat I can't really get much accomplished. Fortunately I still have many parts in the basement to sort. Things like the fuel shutoff valves, instruments and of course I have the engine baffles, such as they are.

Not quite sure what I'm going to do with these yet, but for starters I removed all the seals and patches (including some 5/32 rivits, which I guess were big enough)


 There is supposed to be a baffle under the crankcase on top of the intake spider, but it was missing when I dismantled. Thanks to the Taylorcrafters at Taylorcraft.org I now know what it looks like so should be able to fabricate a new one.
The front and side baffles look like they will be easier to fabricate.

November 2014
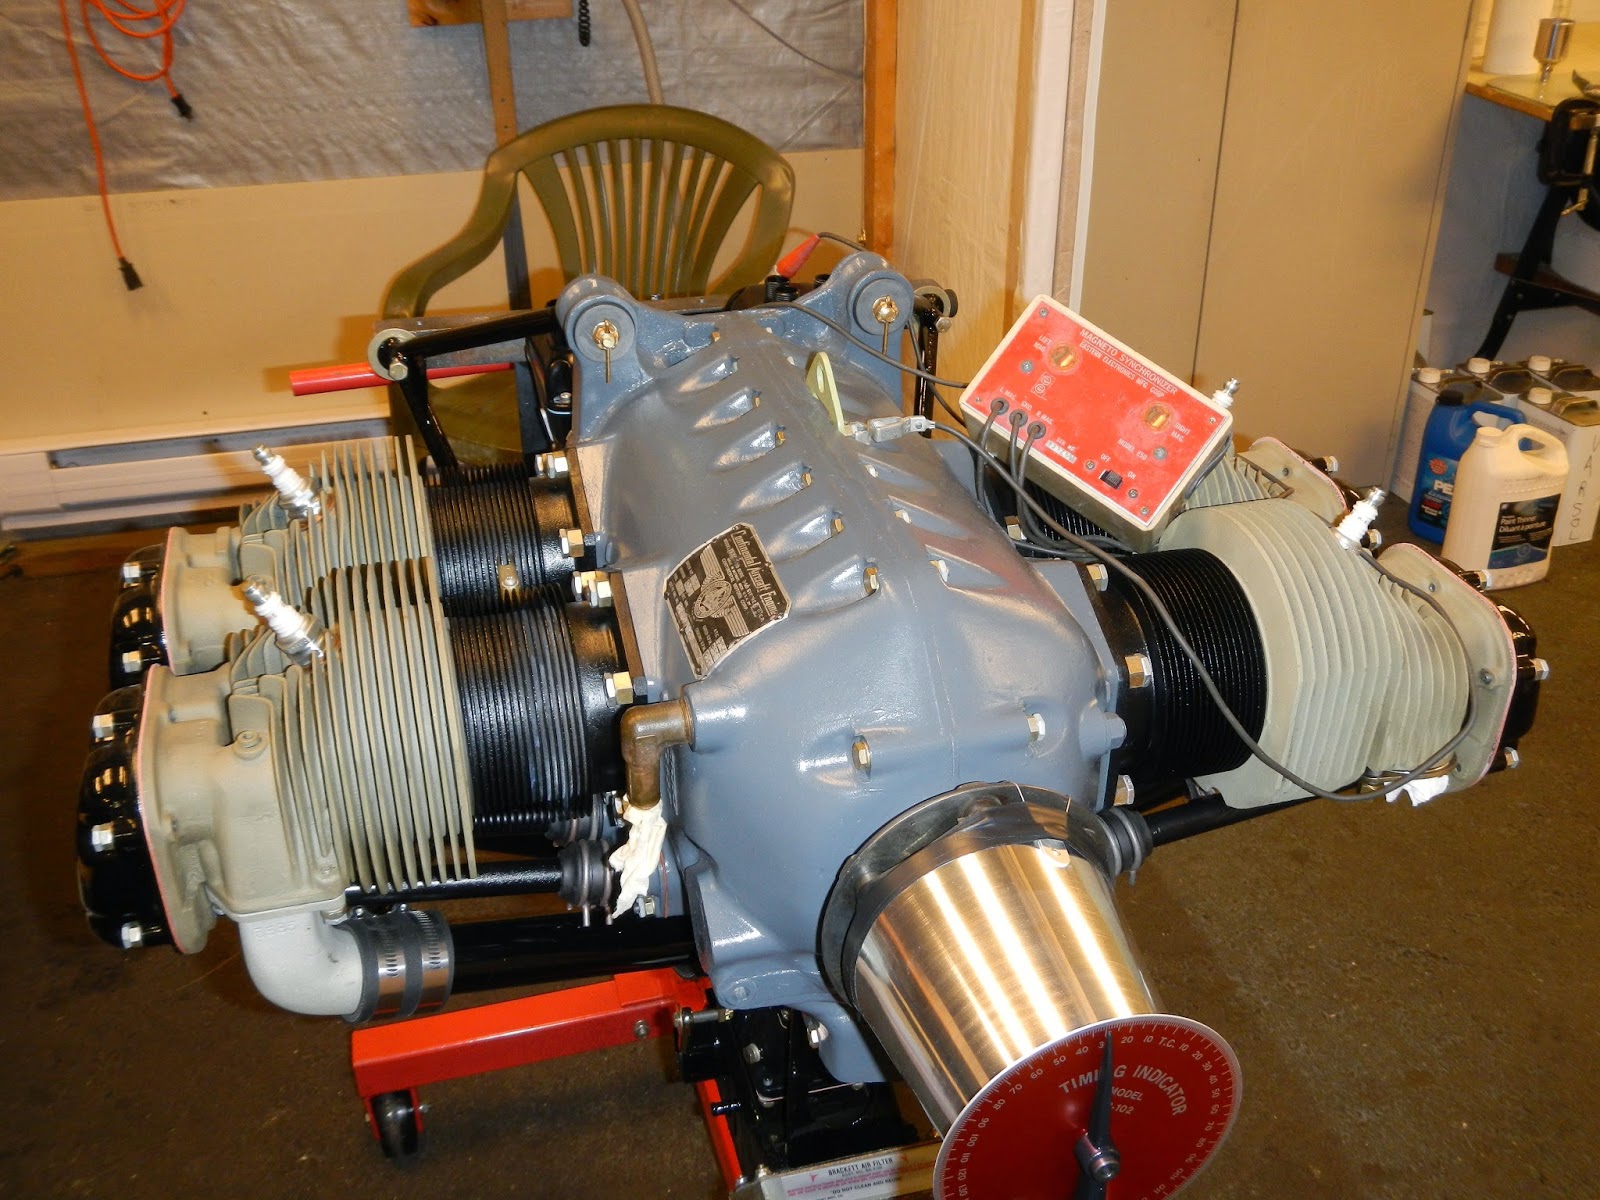
Mags

At various points during the "rib-fest" (See Wings section), I needed a win (ie complete something) in order to preserve sanity. The magnetos seemed to be a quick and easy project and also one that would potentially significantly impact the budget.
 Mags were cleaned up, inspected, tested, painted felts lubricated, and installed on the engine.
I've decided to stick to the original installation, at least for now. The Bendix mags seem to be in really good shape. Contact breakers look like new and the mags yeild a health spark just by turning over by hand.
Managed to get some new gaskets, slotted machine screws and lock washers, and I replaced the phenolic insulator on the P lead on one unit.
 Mags installed:
and timed:
July 2014

New inter-cylinder baffles fabricated and installed

When I test fit the old baffles I noticed a significant gap between the top of the baffles and the crank case, so I extended the new baffles in this area (no point in letting cooling air by-pass the cooling fins).

Winter 2014:
I converted an old sandblaster to use soda which is wonderful for cleaning parts as it's not aggressively abrasive and dissolves in water (the soda that is).

I decided the A65 should be evaluated before I go too far. The motor had been in a crate since the late 80's and I needed to determine if it was salvageable. The cost of an engine overhaul obviously makes the project a different financial challenge.

I pulled all four cylinders and was surprised at how good the internals looked. Externally it still had lots of oily dirt to protect it. Preliminary inspection of the cylinders indicated +015 oversize and well within the service limits.

What followed was hours of parts cleaning.
I've been hauling and storing (mostly in the back yard) that media-blaster for 25years, good to see it was worth it. The soda cleans the parts without abrasion.


and after soda blasting.

.....cleaning and inspecting...

Some of the exhaust studs needed to be drilled out....

I'm now in the process of lapping each valve, lightly honing each cylinder, and inspecting measuring all parts for excessive wear or cracks. So far things are looking good and I've also found most of the parts I need for reassembly including +0.015 piston rings.

Also cleaned up and straightened the carb airbox and a few other parts:

The carb heat butterfly shaft and bushings were obviously worn which required further dismantling. The butterfly is actually brazed to the shaft so I decided to fabricate new parts

With the shaft removed new bronze bushings installed, some metal banging to straighten the box as much as possible, and weld up a couple of cracks.

Then Imron

Each cylinder inspected, measured, light hone, steel painted, heads acid etched and alodined


Rudimentary but effective way to leak-check. Valves seal under their own weight (no springs installed yet)

Intakes are also soda-blasted, etched and conversion coated

Crankcase assembly stripped and cleaned ready for paint. New crank seal installed

Engine mount is another story....

Finally, all the top end parts are ready for reassembly

 Valves, springs & retainers, and reinstall the pushrod tubes using a threaded rod to pull them into place. Tubes are a common oil leak source so I put them in with PRC two part sealant.
Two down, two to go...

And the intake system

Rocker covers also blasted etched and painted.

 The carb was ok except for the usual wear in the throttle shaft and bushings. Cannot buy these shafts any more.
I was able to clean up the shaft on the lathe by machining about 0.005" off the diameter. I then turned some new bronze bushings (bushes) and ended up with a good result.

The rest of the carb is dismantled, cleaned & inspected, painted and reassembled


Work out some dents in the oil tank and welded on a new tab to safety wire the plug. Then etch clean, epoxy primer and imron.

Oil tank cap gets rebuilt with new tabs welded on to what was left of the old, then etch cleaned, epoxy primed and urethane yellow.
Coming together:


Scott, great summary of excellence in every step. It brings back memories of when we overhauled this very engine while in A&P school in Denver Co around 1966. Yes, I remember putting in .015 rings and .010 undersize crankshaft bearings. thanks for sharing your good work and I hope some day to see it. Glen Mast
ReplyDeleteI really appreciate your publishing your restoration/rebuild. I just found this today. I am in the process of looking for a "project" Tcraft and looking for as much information as I can find. The last time I worked on one was in 1990. Where mine was recovered and the whole aircraft brought back to a fresh annual. I didn't get my fill before I had to sell it and am hoping to do it again. You have brought many things back to mind and given me many new things to think about. You have done exquisite work. I especially appreciated your inputs on the cooling baffles.
ReplyDelete